Flutter Switch Widget
Flutter Switch widget can be used to ON or OFF a single setting. There is a distinguishable difference between ON and OFF states and animation associated when changing state.
In this tutorial, we shall learn how to use Switch widget.
When user presses on the Switch, onChanged() callback method will be called with the new state value as a boolean value. The boolean value is true if the switch is turned on, or false if the switch is turned off.
Initial state of the switch can be provided using value property of Switch widget. Also, when the callback method onChanged() is called, you have to update the value property.
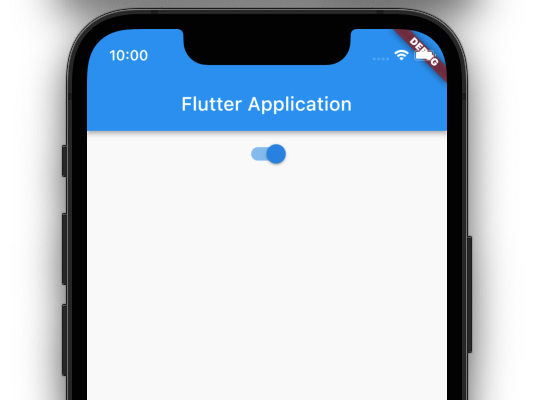
Example
In this example, we shall implement a Switch widget.
main.dart
import 'package:flutter/material.dart';

void main() => runApp(const MyApp());

/// main application widget
class MyApp extends StatelessWidget {
  const MyApp({Key? key}) : super(key: key);

  static const String _title = 'Flutter Application';

  @override
  Widget build(BuildContext context) {
    return MaterialApp(
      title: _title,
      home: Scaffold(
        appBar: AppBar(title: const Text(_title)),
        body: const MyStatefulWidget(),
      ),
    );
  }
}

/// stateful widget that the main application instantiates
class MyStatefulWidget extends StatefulWidget {
  const MyStatefulWidget({Key? key}) : super(key: key);

  @override
  State<MyStatefulWidget> createState() => _MyStatefulWidgetState();
}

/// private State class that goes with MyStatefulWidget
class _MyStatefulWidgetState extends State<MyStatefulWidget> {
  bool isSwitched = false;
  @override
  Widget build(BuildContext context) {
    return Center(
      child: Column(
        children: <Widget>[
          Switch(
            value: isSwitched,
            onChanged: (value) {
              setState(() {
                isSwitched = value;
              });
            },
          ),
        ],
      ),
    );
  }
}
Video
Summary
In this Flutter Tutorial, we learned how to use Switch widget, with the help of well detailed example Flutter Application.