Flutter Button – Background Color with Radial Gradient
In this tutorial, we will learn how to generate a radial gradient color background for a button.
We shall use Container widget with its decoration property doing the gradient magic. The child of this Container would be our FlatButton.
Sample Code Snippet
Following is a sample code snippet of Container that decorates a FlatButton with radial gradient of colors provided.
Container(
  decoration: new BoxDecoration(
	gradient: new RadialGradient(
	  colors: [Colors.blue, Colors.indigo],
	),
  ),
  child: FlatButton(
	child: new Text('Login'),
	onPressed: () {},
  ),
),
You may provide other properties of Container and FlatButton widgets as required.
Example – Radial Gradient
In this example Flutter Application, we have created four buttons with different scenarios of producing radial gradient background for buttons based on the number of colors and radius given.
Try running this application and we shall explain each of these gradient buttons in detail to get an understanding on some of the various options available to produce a gradient background for a button.
To recreate the following example Flutter Application, you may create a basic Flutter application and replace main.dart with the following code.
main.dart
import 'package:flutter/material.dart';

void main() {
  runApp(MyApp());
}

class MyApp extends StatefulWidget {
  @override
  _MyAppState createState() => _MyAppState();
}

class _MyAppState extends State<MyApp> {
  @override
  Widget build(BuildContext context) {
    return MaterialApp(
      home: Scaffold(
          appBar: AppBar(
            title: Text('Flutter Tutorial - googleflutter.com'),
          ),
          body: Center(child: Column(children: <Widget>[
            Container(
              margin: EdgeInsets.all(20),
              width: 100,
              height: 100,
              decoration: new BoxDecoration(
                shape: BoxShape.circle,
                gradient: new RadialGradient(
                  colors: [Colors.blue, Colors.indigo],
                ),
              ),
              child: FlatButton(
                child: new Text(
                  'Login',
                  style: TextStyle(color: Colors.white),
                ),
                onPressed: () {},
              ),
            ),
            Container(
              margin: EdgeInsets.all(20),
              width: 200,
              height: 50,
              decoration: new BoxDecoration(
                gradient: new RadialGradient(
                  radius: 2,
                  colors: [Colors.yellowAccent, Colors.orange],
                ),
              ),
              child: FlatButton(
                child: new Text(
                  'Login',
                ),
                onPressed: () {},
              ),
            ),
            Container(
              margin: EdgeInsets.all(20),
              width: 200,
              height: 50,
              decoration: new BoxDecoration(
                gradient: new RadialGradient(
                  radius: 3,
                  focalRadius: 5,
                  colors: [Colors.lightGreenAccent, Colors.orange],
                ),
              ),
              child: FlatButton(
                child: new Text(
                  'Login',
                ),
                onPressed: () {},
              ),
            ),
            Container(
              margin: EdgeInsets.all(20),
              width: 200,
              height: 50,
              decoration: new BoxDecoration(
                gradient: new RadialGradient(
                  radius: 2,
                  colors: [Colors.black45, Colors.blue, Colors.blueGrey, Colors.blue, Colors.blueGrey],
                ),
              ),
              child: FlatButton(
                child: new Text(
                  'Login',
                  style: TextStyle(color: Colors.white),
                ),
                onPressed: () {},
              ),
            ),
          ]))),
    );
  }
}
Screenshot
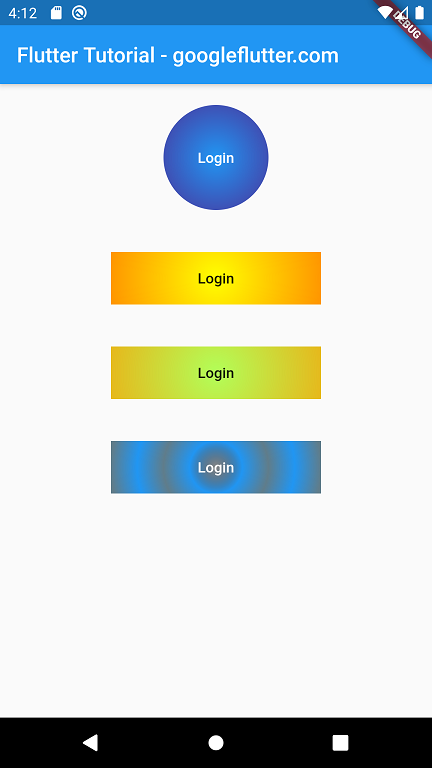
First Button
First Button is of circular shape with radial gradient achieved through Container widget’s decoration property.
Second Button & Third Button
These two buttons demonstrate the effect of radius on radial gradient.
Fourth Button
Fourth Button has a ripple like background gradient achieved by providing more than two colors in the gradient property.
Summary
In this Flutter Tutorial, we learned how to generate a radial gradient background for a button in Flutter.