In this tutorial, we will build a Barcode Scanner Flutter Application to scan barcode using camera and get the barcode number.
We shall use an external packages for this application.
- barcode_scan – package to help with the actual barcode scanning.
Add barcode_scan to dependencies in pubspec.yaml file as shown below. If you don’t know the version, you may specify any to pick the latest version.
pubspec.yaml
dependencies:
  flutter:
    sdk: flutter
  barcode_scan: any
After you change pubspec.yaml file, click on Packgets get link in the Flutter commands displayed on top right corner.
Create a basic Flutter Application and replace main.dart with the following code.
main.dart
import 'dart:async';
import 'package:barcode_scan/barcode_scan.dart';
import 'package:flutter/material.dart';
import 'package:flutter/services.dart';
void main() {
runApp(MyApp());
}
class MyApp extends StatefulWidget {
@override
_MyAppState createState() => _MyAppState();
}
class _MyAppState extends State<MyApp> {
String barcode = "";
@override
initState() {
super.initState();
}
@override
Widget build(BuildContext context) {
return MaterialApp(
home: Scaffold(
appBar: AppBar(
title: Text('Barcode Scanner - googleflutter.com'),
),
body: Center(
child: Column(
children: <Widget>[
Container(
child: RaisedButton(
onPressed: barcodeScanning,
child: Text("Capture Image",
style: TextStyle(fontSize: 20, color: Colors.white),
),
color: Colors.green,
),
padding: const EdgeInsets.all(10.0),
margin: EdgeInsets.all(10),
),
Padding(
padding: const EdgeInsets.all(8.0),
),
Text("Scanned Barcode Number",
style: TextStyle(fontSize: 20),
),
Text(barcode,
style: TextStyle(fontSize: 25, color:Colors.green),
),
],
),
)),
);
}
//scan barcode asynchronously
Future barcodeScanning() async {
try {
String barcode = await BarcodeScanner.scan();
setState(() => this.barcode = barcode);
} on PlatformException catch (e) {
if (e.code == BarcodeScanner.CameraAccessDenied) {
setState(() {
this.barcode = 'No camera permission!';
});
} else {
setState(() => this.barcode = 'Unknown error: $e');
}
} on FormatException {
setState(() => this.barcode =
'Nothing captured.');
} catch (e) {
setState(() => this.barcode = 'Unknown error: $e');
}
}
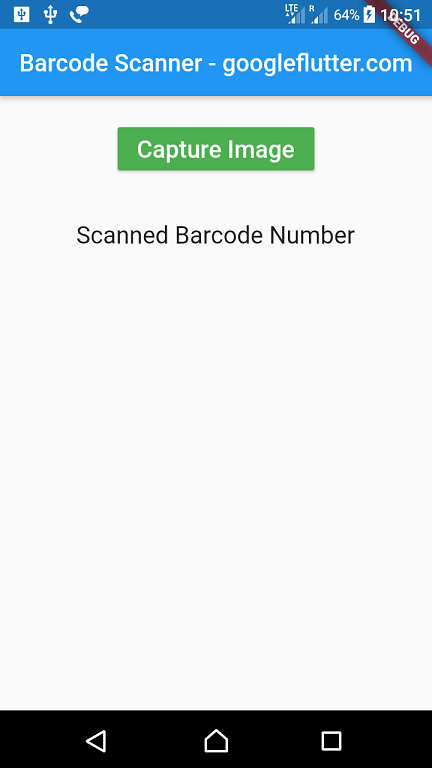
}Run the application, and you should see UI as shown in the following screenshot. Click on Capture Image. If asked for Camera permission, give the permission so that our application can access camera to scan barcode.
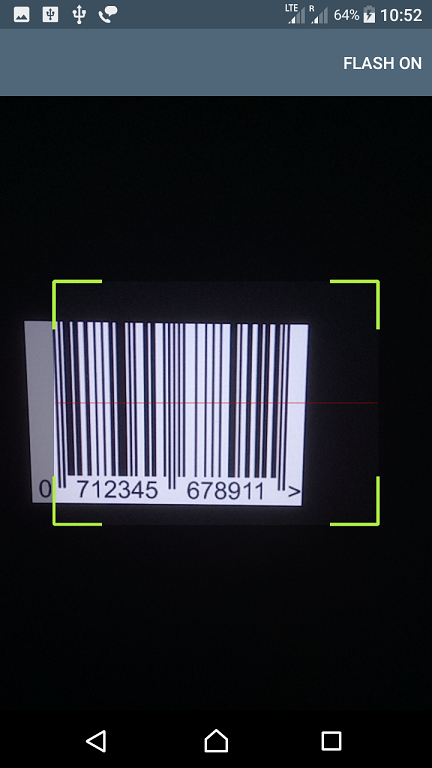
When you click on the Capture Image button, camera will be opened, and point your camera to the barcode such that the barcode is within the green box.
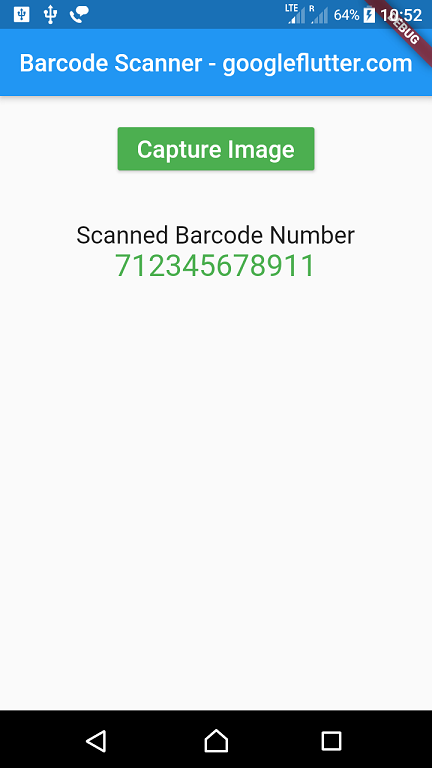
When Barcode Scanner is able to read the barcode number from the Camera image, the barcode number is displayed.
Summary
In this Flutter Tutorial, we learned how to scan a barcode using Barcode Scanner Flutter application.